
There’s nothing quite like a creamy, comforting bowl of mac and cheese to soothe the soul after a long day.
This easy mac and cheese recipe is perfect for those busy weeknights when you crave something homemade but don’t have hours to spend in the kitchen.
The rich, cheesy flavor combined with the tender pasta is a simple yet satisfying delight.
I first fell in love with this dish during my college days when quick and easy meals were a necessity.
Now, it has become a family favorite that I can whip up in no time.
Whether you’re cooking for kids or adults, this mac and cheese is sure to be a hit.
The History and Cultural Significance
• Mac and Cheese traces its origins to Italy in the 13th century, where it was originally created by chefs using lasagna-style sheets of pasta and parmesan cheese.
• The dish evolved over decades as cheddar cheese was introduced and elbow macaroni became popular, eventually becoming the beloved version we know today.
• In the United States, this dish traditionally appears at family gatherings and holiday celebrations, symbolizing warmth and togetherness.
• While many variations exist across different regions, the authentic version maintains a creamy, cheese-laden sauce that sets it apart from imitations.
Recipe Overview
Nutritional Information (per serving)
Essential Equipment Guide
Large Pot: A large pot is essential for boiling the pasta to ensure it has enough space to move around and cook evenly. Alternatives like a Dutch oven can work, but ensure it can hold at least 4 quarts of water.
Whisk: A whisk is important for making a smooth cheese sauce without lumps. A silicone whisk is ideal for non-stick pans to avoid scratching them.
Baking Dish: If you prefer a baked mac and cheese with a crispy top, a baking dish is necessary. Look for an oven-safe dish that distributes heat evenly.
Ingredients
For the Base
|
|
| Amount | Ingredient | Notes |
|---|---|---|
| 8 ounces | elbow macaroni | cooked al dente, as the pasta will continue to cook in the sauce |
For the Sauce
| Amount | Ingredient | Notes |
|---|---|---|
| 2 cups | cheddar cheese | shredded, provides creamy texture |
| 2 tablespoons | butter | adds richness |
| 2 tablespoons | all-purpose flour | thickens the sauce |
| 2 cups | milk | creates a smooth base, use whole milk for best results |
Seasonings
| Amount | Ingredient | Notes |
|---|---|---|
| 1/2 teaspoon | salt | enhances flavor |
| 1/4 teaspoon | black pepper | adds subtle heat |
| 1/4 teaspoon | mustard powder | adds depth and complexity |
Preparation Methods
Roux Making: A roux is a mixture of fat and flour used to thicken sauces. It's essential for mac and cheese to create a smooth, creamy base. Cook the flour in melted butter until it smells nutty to avoid a raw flour taste.
Cheese Melting: Gradually add cheese to the hot sauce, stirring constantly. This prevents the cheese from clumping and ensures a smooth, creamy texture.
Pasta Cooking: Cooking pasta al dente is crucial as it will continue to cook in the cheese sauce. This prevents the pasta from becoming mushy when baked.
Step 1: Prepare Ingredients
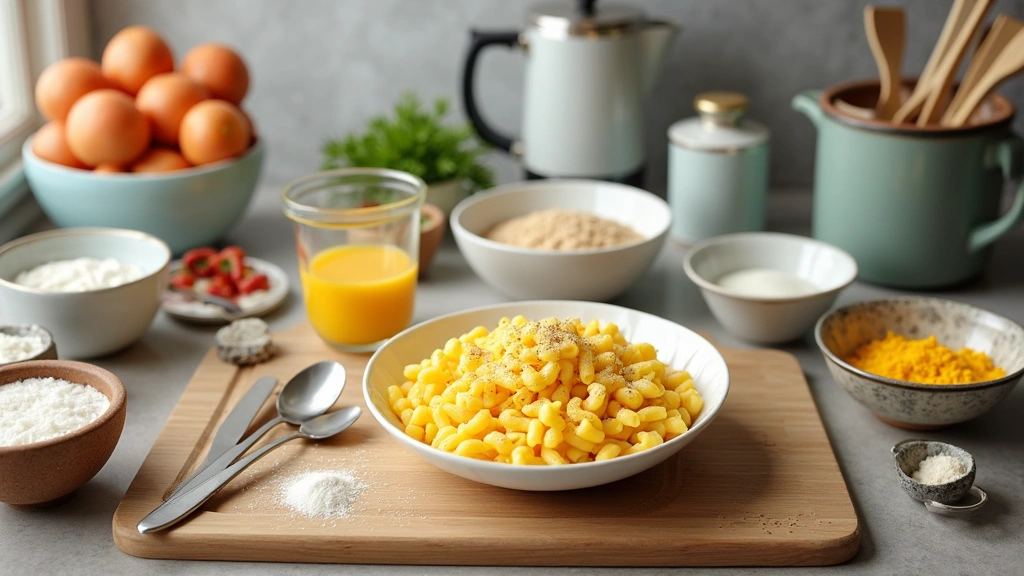
Gather all the ingredients and equipment needed for the recipe.
Ensure the cheese is shredded and the pasta is cooked al dente.
Pre-measure the milk, butter, and flour to streamline the cooking process.
Having everything ready makes the cooking process smoother.
Step 2: Cook the Pasta
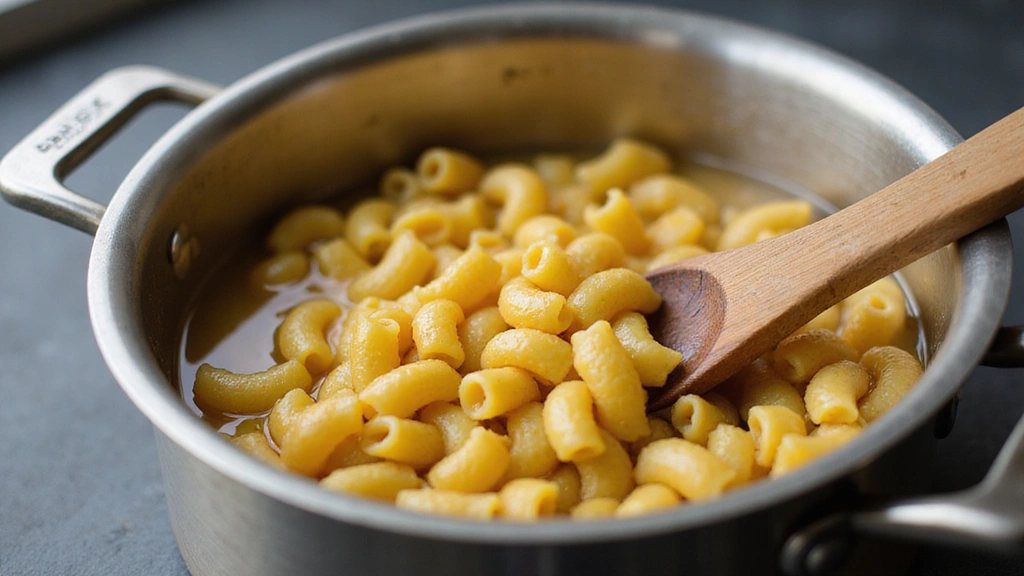
Bring a large pot of salted water to a boil.
Add the elbow macaroni and stir occasionally to prevent sticking.
Cook the pasta until al dente, usually about 7-8 minutes.
Drain the pasta and set it aside.
Step 3: Make the Roux
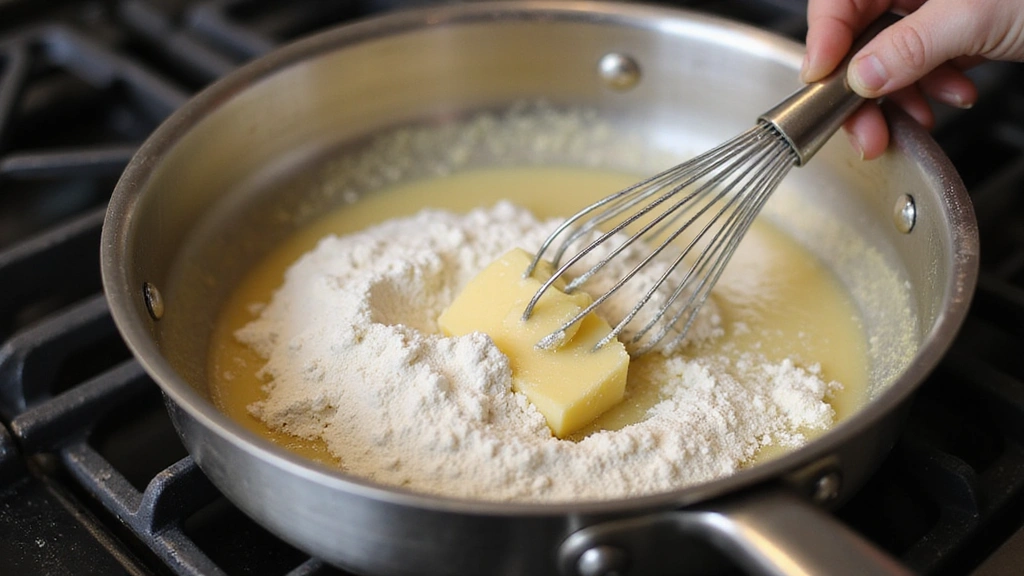
In a separate saucepan, melt butter over medium heat.
Add the flour and whisk constantly for about 1-2 minutes.
The mixture should become bubbly and slightly golden.
This step ensures the roux will thicken the sauce without a raw flour taste.
Step 4: Add Milk to the Roux
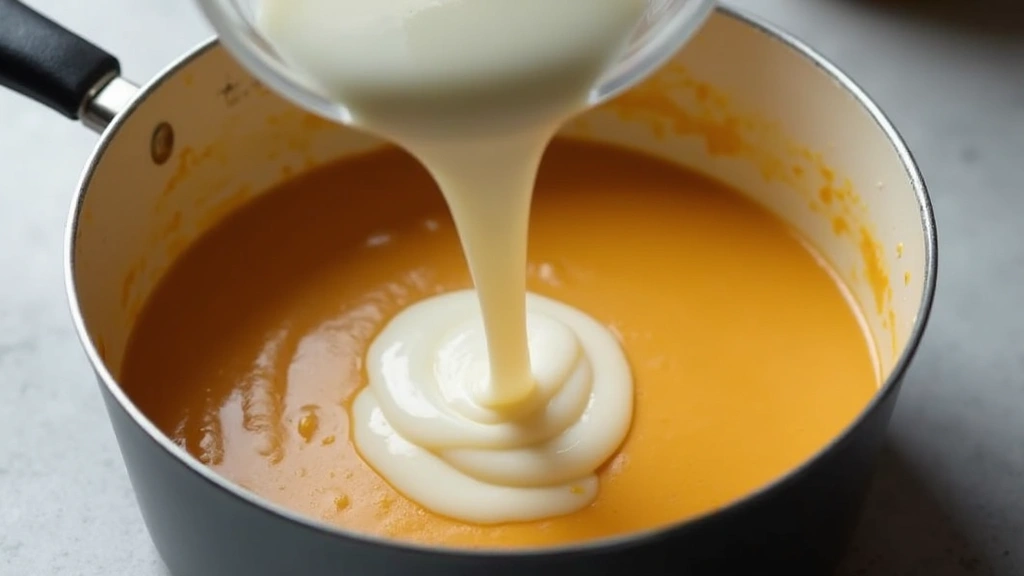
Gradually whisk in the milk, continuing to stir constantly.
Increase the heat to medium-high and bring the mixture to a gentle simmer.
The sauce should start to thicken after a few minutes.
Be patient and keep whisking to avoid lumps.
Step 5: Melt the Cheese
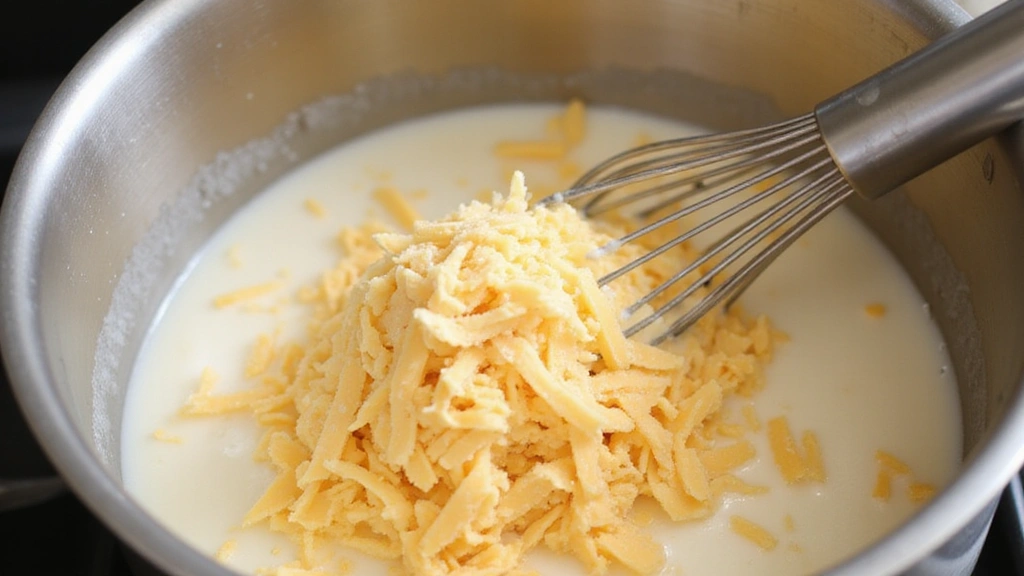
Reduce the heat to low and slowly add the shredded cheddar cheese.
Stir constantly until the cheese is completely melted and the sauce is smooth.
Add salt, pepper, and mustard powder, mixing well to combine.
Taste and adjust seasonings as needed.
Step 6: Combine Pasta and Sauce
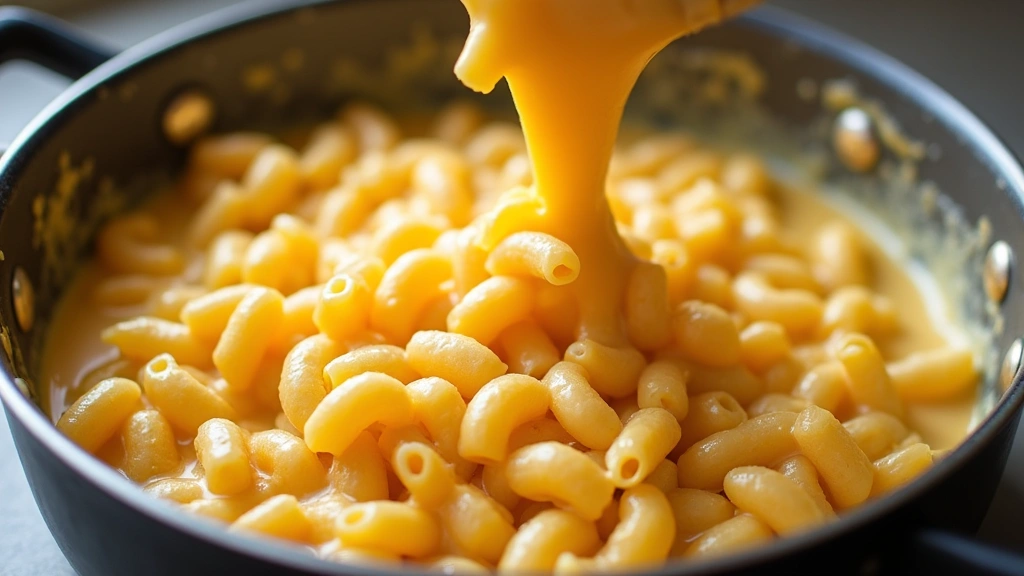
Add the cooked pasta to the cheese sauce, stirring gently to coat.
Ensure all the pasta is evenly covered with the sauce.
The mixture should be creamy and slightly thick.
This is the base for both stovetop and baked versions.
Step 7: Bake the Mac and Cheese (Optional)
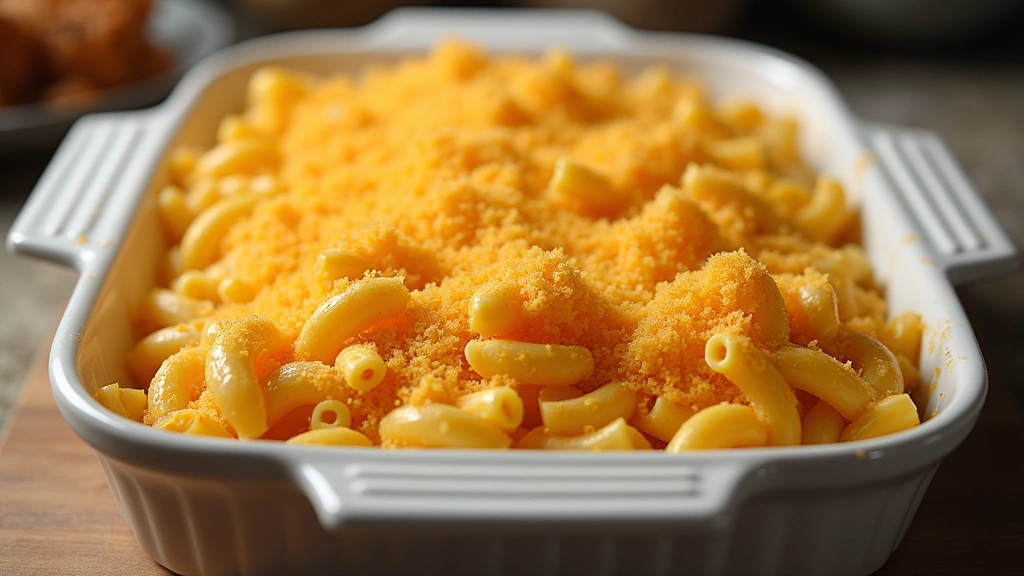
Preheat the oven to 350°F (175°C) if baking.
Transfer the mac and cheese to a baking dish, spreading it evenly.
Top with additional shredded cheese or breadcrumbs for a crispy topping.
Bake for 15-20 minutes until golden and bubbly.
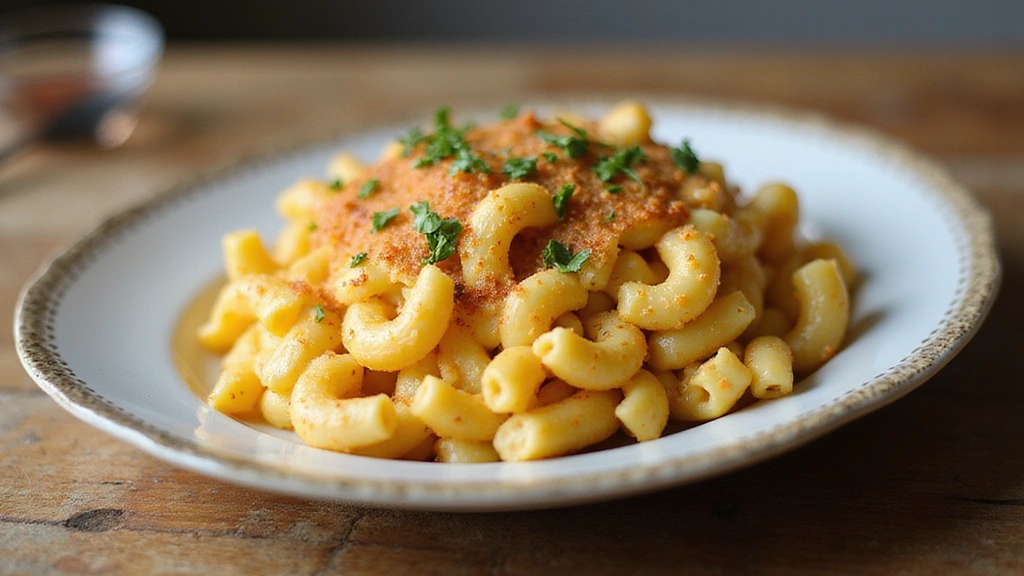
Step 8: Serve and Enjoy

Remove the mac and cheese from the oven if baked.
Let it cool slightly before serving to allow the cheese to set.
Garnish with fresh parsley or black pepper if desired.
Serve warm and enjoy the creamy, cheesy goodness.
Critical Timing and Temperature Guide
Pasta Cooking: Boil pasta for exactly 7-8 minutes until al dente, ensuring it remains firm to the bite and doesn't become mushy in the sauce.
Sauce Thickening: Allow the roux to cook for about 1-2 minutes to eliminate the raw flour taste, and ensure the sauce thickens properly.
Baking: If baking, preheat the oven to 350°F (175°C) and bake for 15-20 minutes until the top is golden brown and bubbly, avoiding overbaking which can dry out the dish.
Pro Tips for Mac and Cheese
• Ingredient Selection: Use high-quality cheddar cheese for a better melt and richer flavor, as it is the star ingredient of the dish.
• Preparation Secret: Toast the flour in butter to develop a nutty flavor, which enhances the overall taste of the sauce.
• Temperature Management: Keep the heat low when melting cheese to prevent it from becoming grainy or separating.
• Texture Enhancement: For a crunchy topping, add breadcrumbs mixed with melted butter before baking.
• Flavor Layering: Incorporate mustard powder into the sauce for a subtle tang that enhances the cheese flavor.
• Make-Ahead Strategies: Prepare the cheese sauce in advance and store it in the fridge for up to two days, reheating gently before combining with pasta.
• Restaurant-Quality Finishing Touches: Garnish with fresh herbs like parsley or chives for a burst of color and freshness.
• Equipment Optimization: Use a non-stick saucepan for the cheese sauce to prevent sticking and ensure easy cleanup.
Troubleshooting Common Issues
• Sauce Too Thin: If the sauce is too thin, continue cooking over low heat while stirring until it thickens, or add a slurry of cornstarch and water.
• Cheese Clumping: Ensure cheese is added gradually and the sauce isn't too hot, melting slowly to achieve a smooth consistency.
• Pasta Overcooked: Cook pasta al dente and shock in cold water if necessary to stop the cooking process and maintain texture.
• Sauce Separating: Keep the heat low and add cheese slowly, stirring constantly to prevent oils from separating.
• Lack of Flavor: Taste the sauce before combining with pasta. Adjust salt and add a pinch of cayenne for a flavor boost.
• Dry Mac and Cheese: Ensure enough sauce is made to fully coat the pasta and cover with foil when baking to retain moisture.
Variations and Regional Differences
• Southern Style: This version often includes a mix of cheeses like cheddar and Monterey Jack, and sometimes adds eggs for a custard-like texture.
• Italian Style: Uses a béchamel sauce base with Parmesan and mozzarella cheese, often topped with breadcrumbs and baked.
• New England Style: Incorporates lobster or seafood into the mac and cheese for a luxurious twist on the classic.
• Vegan Version: Utilizes nutritional yeast, plant-based milk, and vegan butter for a dairy-free alternative with a nutritional boost.
Food Science Behind the Recipe
• Emulsification: The process of combining cheese and liquid to create a smooth sauce relies on emulsification, where the fat in cheese is suspended within the liquid.
• Starch Gelatinization: As the pasta cooks, the starches swell and gelatinize, helping to thicken the cheese sauce and bind it to the pasta.
• Protein Denaturation: When cheese is melted, the proteins denature and realign, creating a gooey texture essential for creamy mac and cheese.
Frequently Asked Questions
What's the most common mistake people make when preparing mac and cheese? Overcooking the pasta is a frequent issue, as it continues to cook when mixed with the cheese sauce.
Can I use pre-shredded cheese? It's best to shred your own cheese, as pre-shredded varieties often contain anti-caking agents that can affect the sauce's texture.
How can I make the dish more nutritious? Add vegetables like broccoli or spinach, or use whole wheat pasta for added fiber.
Can I freeze mac and cheese? Yes, you can freeze it, but the texture may change slightly. Reheat gently to prevent separation.
What's the best way to reheat leftovers? Reheat on the stovetop with a splash of milk to restore creaminess, or cover and heat in the oven.
How do I prevent the sauce from becoming grainy? Gradually melt cheese over low heat to prevent the proteins from clumping.
Can I make this recipe gluten-free? Yes, use gluten-free pasta and substitute the flour with a gluten-free alternative like cornstarch.
Serving and Presentation Guide
• Traditional Presentation: Serve in a large serving bowl with a sprinkle of fresh parsley on top.
• Individual Servings: Present in ramekins for a personalized touch, especially for dinner parties.
• Family-Style: Serve directly from the baking dish at the table, allowing guests to help themselves.
• Gourmet Touch: Add a drizzle of truffle oil and shaved parmesan for an upscale version.
Conclusion
I hope this easy mac and cheese recipe becomes a staple in your weeknight meal rotation.
With its creamy, cheesy goodness and quick preparation, it's sure to please everyone at the table.
Remember, the key to great mac and cheese is quality ingredients and a little patience.
Enjoy the warmth and comfort this dish brings to your home.